

Welcome to the “Love Me Do” Valentine’s Blog Hop! This week, January 16th-20th, we have a group of 5 talented designers sharing projects with you on their blogs to get you prepared for the upcoming season of love! Whether you use these designs to create something for your loved ones or spring-board off the inspirations given, we would love to see your work as well, so leave a comment on the blogs as you go through.
On January 24th, we will be giving away a
collection of goodies from the group to one lucky participant. The giveaway will be hosted through filling
out a Google Docs form, on Live.Teach.Create on
January 20th, asking various questions about the posts throughout
the week. All those who enter with the
correct answers will have a chance to win!
And now on to my project for today!

These adorable little snacks are perfect for any Valentine's Day party or just because!
Ingredients:
1 box/bag of your favorite cookie mix (or you can use your favorite homemade recipe) mixed up according to package directions
Chocolate bark coating (chocolate or white, your choice)
Sprinkles
You'll also need a cake ball pan or stand alone maker. I have a stand alone maker.
A few things to note before we get started:
I used this cookie mix because I found it on clearance after Christmas. I did not use the peppermint pieces. I just mixed up the dough per the package instructions without the peppermint.


I have a stand alone cake ball maker, but you should be able to use a cake ball pan if you have one. However, I would not necessarily use the cake pop directions that require baking and then mixing with frosting. It may work, but cookies tend to be more dense than cake and that may throw off the texture.


Directions:
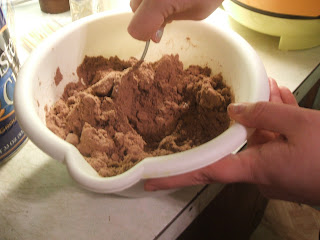
1) Prepare cookie mix to package or recipe directions. This is also a good time to preheat your cake ball maker or oven.


2) Roll dough into balls appropriate in size for your cake ball maker. Mine are somewhat large, so I made the dough balls a little larger than I thought necessary.

3) Put 1 dough ball into each cavity of your cake ball maker.

And now on to my project for today!

These adorable little snacks are perfect for any Valentine's Day party or just because!
Valentine's Day Cookie Balls
Ingredients:
1 box/bag of your favorite cookie mix (or you can use your favorite homemade recipe) mixed up according to package directions
Chocolate bark coating (chocolate or white, your choice)
Sprinkles
You'll also need a cake ball pan or stand alone maker. I have a stand alone maker.
A few things to note before we get started:
I used this cookie mix because I found it on clearance after Christmas. I did not use the peppermint pieces. I just mixed up the dough per the package instructions without the peppermint.


I have a stand alone cake ball maker, but you should be able to use a cake ball pan if you have one. However, I would not necessarily use the cake pop directions that require baking and then mixing with frosting. It may work, but cookies tend to be more dense than cake and that may throw off the texture.


Directions:
1) Prepare cookie mix to package or recipe directions. This is also a good time to preheat your cake ball maker or oven.


2) Roll dough into balls appropriate in size for your cake ball maker. Mine are somewhat large, so I made the dough balls a little larger than I thought necessary.

3) Put 1 dough ball into each cavity of your cake ball maker.

4) Check for doneness by sticking a toothpick into the center of each cookie ball after about 7 minutes. My cake ball maker recommended that most recipes would take 7 - 10 minutes to cook. These cookie balls (probably due to density) actually took more like 12 - 15. You'll also notice that most of mine did not get round on both sides. This is due to the fact that cookie dough doesn't rise like cake batter does. This is fine and actually how I wanted them. While the last batch is baking, it would be a good idea to start melting the chocolate you will use to coat.


5) Coat cooled cookie balls in melted chocolate bark (any variety you want - you could even color the white stuff). Add sprinkles on top immediately after being coated.

6) Enjoy! These were all gone at my house within 2 days!

Thanks for joining me today for Day 5 of the “Love Me Do” Valentine’s Blog Hop! Next person in the hop is Claudia.
No comments:
Post a Comment