With A Side of Jess: tutorial
Showing posts with label tutorial. Show all posts

Thursday, May 30, 2013

Make your garden beautiful with Miracle-Gro and The Gro Project

This is a Sponsored post written by me on behalf of Miracle-Gro. All opinions are 100% mine.

Now that it's officially after Mother's Day, I've been itching to get out in the garden and make things pretty again. Truthfully though, the great care we gave our flowers last year paired with the mild winter we had has given us some beautiful flowers already.

The tulips have come and gone, as have the crocosus. The peonies are blooming - it is after Memorial Day as well afterall - and the lilies have great greenery which tells me their blooms later in the season will be beautiful as well.

Since the majority of our already established plants and flowers are doing so well, all that's left is to add a few finishing touches and random pops of flowers to complete the yard.

That's where Miracle-Gro and their ideas for fun garden projects come in!

Monday, January 14, 2013

How to get a great manicure with Neutrogena Norwegian Hand Cream & Giveaway - CLOSED


Neutrogena Norwegian Formula Hand Cream is not your typical hand cream, lotion or anything else that helps hydrate the skin. To be perfectly honest, I've never tried something quite like it at all before.

It's a glycerin based formula that's concentrated and lasts a long time - both in terms of how many uses you get out of a bottle and in terms of how long the moisture lasts after it's applied. It's also great at helping with many signs of damage:
  • dryness
  • chapping
  • splitting nails
  • dry cuticles
  • scaliness
  • roughness
Although the name suggests the use of hand cream, it can be used for so much more. In addition to your hands, you can use it on your nails, lips, anywhere dry skin pops up.

Not only does it help get your hands in tip-top shape, it also helps keep your manicures looking great too! It keeps your skin and nails moisturized and looking better longer. Say goodbye to a ruined manicure just because your cuticles got dry and peeled!

Below you'll find a step by step guide on how I get a great manicure and keep it looking amazing day after day with the help of Neutrogena Norwegian Formula Hand Cream:

1. Start with clean, dry nails. For me, this means using a hand scrub to help with any rough skin and taking off my old polish.

2. Apply a clear base coat. This will help keep whatever polish you're applying from staining your nails. Some base coats also claim to have other helpful properties which may or may not help your nails.


3. Apply 1 - 3 thin coats of polish depending on the opacity and desired opacity of the polish you have chosen. Personally, I have a few polishes that literally only need 1 coat to be completely opaque and cover my nail. I also have others that take about 3 coats because they are much thinner and the color takes a while to build up.


4. Top your nails with any glitters and/or top coats you'd like. Even though most glitters are suspended in a clear polish, I still put a top coat over to seal things in. Not only does this make the glitter feel less rough on top of my nails, it also helps seal things in and last longer.


5. Finish with a bit of Neutrogena's Norwegian Formula Hand Cream. I do this step at the end of my manicure, and then whenever needed for dry skin throughout the life of my manicure, because that's when it's most effective. As stated earlier, you want to start polishing your nails with dry, clean nails. If you applied your hand cream before you started and then didn't use nail polish remover or wash your hands to remove the oils/hand cream your nail polish wouldn't look as good as it could.

Disclaimer: I received free samples of this through BzzAgent.

Don't forget to enter the giveaway below! Four lucky entrants will win a 0.5 oz sample of Neutrogena's Norwegian Formula Hand Cream to try out for themselves! You can use it to get a great manicure or help with other dry skin issues you may be having during the winter.

EDIT 1/15/13: Contest open to US residents only.

a Rafflecopter giveaway

Tuesday, August 7, 2012

Best of Luck - Tutorial Tuesday


This week's Tutorial Tuesday features a great card (aren't they all?)! It's super quick and easy to make and you don't even need any fancy cutting machines, programs or punches.

You may need to adjust the volume as I was having problems getting the voice over part to be very loud.


Tuesday, May 1, 2012

Feel Better Soon - Tutorial Tuesday


Thanks for checking out this week's Tutorial Tuesday. With all the spring colds and allergies going around, I thought a get well card would be appropriate. Below you'll find a supply list with suggested paper colors, though you can really use any coordinating papers you already have on hand, as well as the video tutorial itself.

Enjoy!

Supplies needed:
A2 card base (4 x 5.5) - white
3.75 x 5.25 solid rectangle - yellow
1 inch squares: 5 patterned and 6 solid - pink
2.25 x 3 solid rectangle - white
2.5 x 3.25 solid rectangle - green
Sentiment stamp
3 small acrylic gems
Adhesive


Tuesday, February 14, 2012

Masculine Valentine - Tutorial Tuesday

Welcome to Tutorial Tuesday week 2!

For those of you wondering how we got to Tutorial Tuesday without having Foodie Friday, I apologize. I decided in a fantastic rash of insanity to clean the bedroom last week. The amount of dust I found sent my allergies into a tizzy and they have now gone into some sort of cold/sinus thing. I was sick and in bed for most of Thursday, Friday and the weekend.

But anyhow, on to today's tutorial!


Tuesday, February 7, 2012

Corner Booksmarks - Corner Chompers - Tutorial Tuesday

Hey everyone!

Today is the first of 4, count them 4, amazing tutorials for the month of February. Some will be video tutorials and some will be the old fashioned step by step written out kind.

As you can see if you scrolled to the bottom of the post already (ending spoiler!), today's post is a video tutorial. I've been playing around with the idea of starting a YouTube channel and this is really the first video I did for it - even though another one was posted first. Please leave comments below or on YouTube if you like or dislike anything. I'm looking for constructive criticism as far as the video quality goes, not content.

So here's what the finished product will look like:


Friday, January 27, 2012

Chocolate Chip Waffles - Foodie Friday

All week I was thinking about what today's Foodie Friday post should be about and all week I came up with nothing. I wasn't cooking anything exciting for dinner. I hadn't seen a recipe that I was over the top to try. I had nothing.

Then, I remembered that my husband had been bugging me to make chocolate chip waffles for a while. I decided I would make some this morning and document how I make them so you could make them too.


Thursday, August 18, 2011

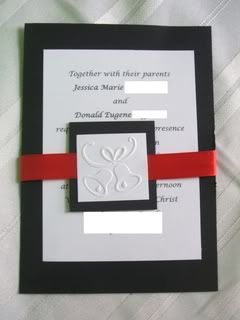
Wedding Invitations - How to

This is a copy and paste of a blog entry I did a while ago on another site. It outlines how I put together the invitations for my wedding.


Thursday, August 11, 2011

Modified wreath tutorial - Now topiary tutorial

The following is a modified tutorial for making a topiary from cupcake wrappers. The original tutorial is from making a wreath from cupcake wrappers.