Showing posts with label Project Pinspiration. Show all posts
Friday, October 11, 2013
Bubble Pizza - Foodie Friday - Project Pinspiration #10
A little while ago I stayed at a friend's house overnight. It was a slumber party of sorts with her and her children. This bubble pizza sounded like a great, kid friendly meal that we could easily cook for dinner. It also helped tat she had all the ingredients on hand already.
Here's how our version turned out:
Friday, September 20, 2013
Warm Bacon & Cheese Dip - Foodie Friday - Project Pinspiration #9
I made this a while ago, a long while ago, but I'm just now getting around to posting it. I don't really have an excuses for that, it's just how life happens sometimes.
And this is how mine turned out:
Wednesday, April 24, 2013
Monday, April 8, 2013
Braided/Beaded Bracelet - Project Pinspiration #7
The picture for this Project Pinspiration idea is super long, sorry about that!
And here's how mine turned out:
Tuesday, February 26, 2013
Project Pinspiration Survey
I'd appreciate it greatly if you could take a minute and help out with this Project Pinspiration survey. I'd like some input from my readers about what project(s) to do next!
If you have any other suggestions, please feel free to link to the pin or blog post in the comments below and I'll add it as a possiblity to the Project Pinspiration board on Pinterest.
Thank you!
If you have any other suggestions, please feel free to link to the pin or blog post in the comments below and I'll add it as a possiblity to the Project Pinspiration board on Pinterest.
Thank you!
Friday, February 22, 2013
Strawberry Ice Box Cake - Foodie Friday - Project Pinspiration #6
When I saw this recipe I just KNEW I had to try it. It looked so delicious and strawberries were on sale at the grocery that week. It was destiny - or at least a great idea with some potential savings at the grocery store.
My version turned out a little different because I just made a half recipe due to the size of pans I had.
Monday, February 11, 2013
Bottle Cap Stamps - Project Pinspiration #5
When I saw this pin I just knew I had to try it. Foam stickers are so cheap to find (I think I've even seen them at the Dollar Tree) and many of us have access to various bottle caps - from pop bottles to medicine bottles.
It also seemed like a great way to keep kids entertained. I know I loved playing with stamps and ink when I was younger. Not much has changed either. Now, as an adult and paper crafter, I still enjoy playing with stamps and ink. This could be a great way to add to your stamp collection without breaking the bank. You'll also get some more unique shapes you may not be able to find in "real" stamp form.
As it turned out, I didn't have any foam stickers just laying around so I borroed some from my sister. She apparently had a bag of jungle themed stickers that had shapes like giraffes, suns, grass, elephants and various other jungle animals. Most of the shapes were too big for any of the bottle caps I had available so I just chose the ones that fit the caps I had.
I used my regular crafting ink on these homemade stamps because it's what I had around the house. I really don't think this project needs to break the bank AND I kind of think it might also work with paint if you're so inclined to try.
If you look at the images I stamped and then at the original stickers, you'll see why the monkey is sort of two-toned. Apparently the different texture on his face and belly took the ink differently and thus stamped a bit lighter than the rest of his body. I actually think that kind of looks better than if he had come out all the same.
I used the grass as a crown to make a dancing princess monkey. That's the great thing about some of the vague shapes you find in foam stickers. You can use them to be just about anything you can imagine. The package says it's a grass sticker but you see a crown? Great! Now you've got a 2-fer. A grass stamp AND a crown stamp.
I don't think the stickers turned out any worse for the wear either. Yeah I did get a little ink around the edge of the monkey cap, but his arm was so thin and I couldn't help it. Otherwise, they did great I think. They're obviously not going to be stamps you pass down, especially if little hands are using them, but they'll work great for a while.
Probably one of the best parts is that if/when the sticker falls off, you can either glue it back on or replace it with a different sticker.
These are the inks I used for my stamping. They're just regular inks you could buy at any craft store.
So what do you think? Will you be trying out your very own foam sticker stamps? I'd love to see what you create with yours so feel free to share links to your projects below!
Friday, February 8, 2013
Jolly Rancher Vodka - Foodie Friday - Project Pinspiration #4
I'm not much of a drinker but when I do drink it's either Long Islands or something fruity and girly - with the occasional shot of something thrown in for good measure. I used to drink more when I was younger - meaning in my 21/22/23/24 years - but some stomach issues, among other things, keep me from drinking much anymore.
However, that didn't stop me from wanting to try this recipe. I love Jolly Ranchers - watermelon and blue raspberry are my favorite - and I thought this might make a decent drink - or shot - to enjoy every now and then. When I decided to make this, I only had enough candies on hand to make two small batches - cherry and green apple.
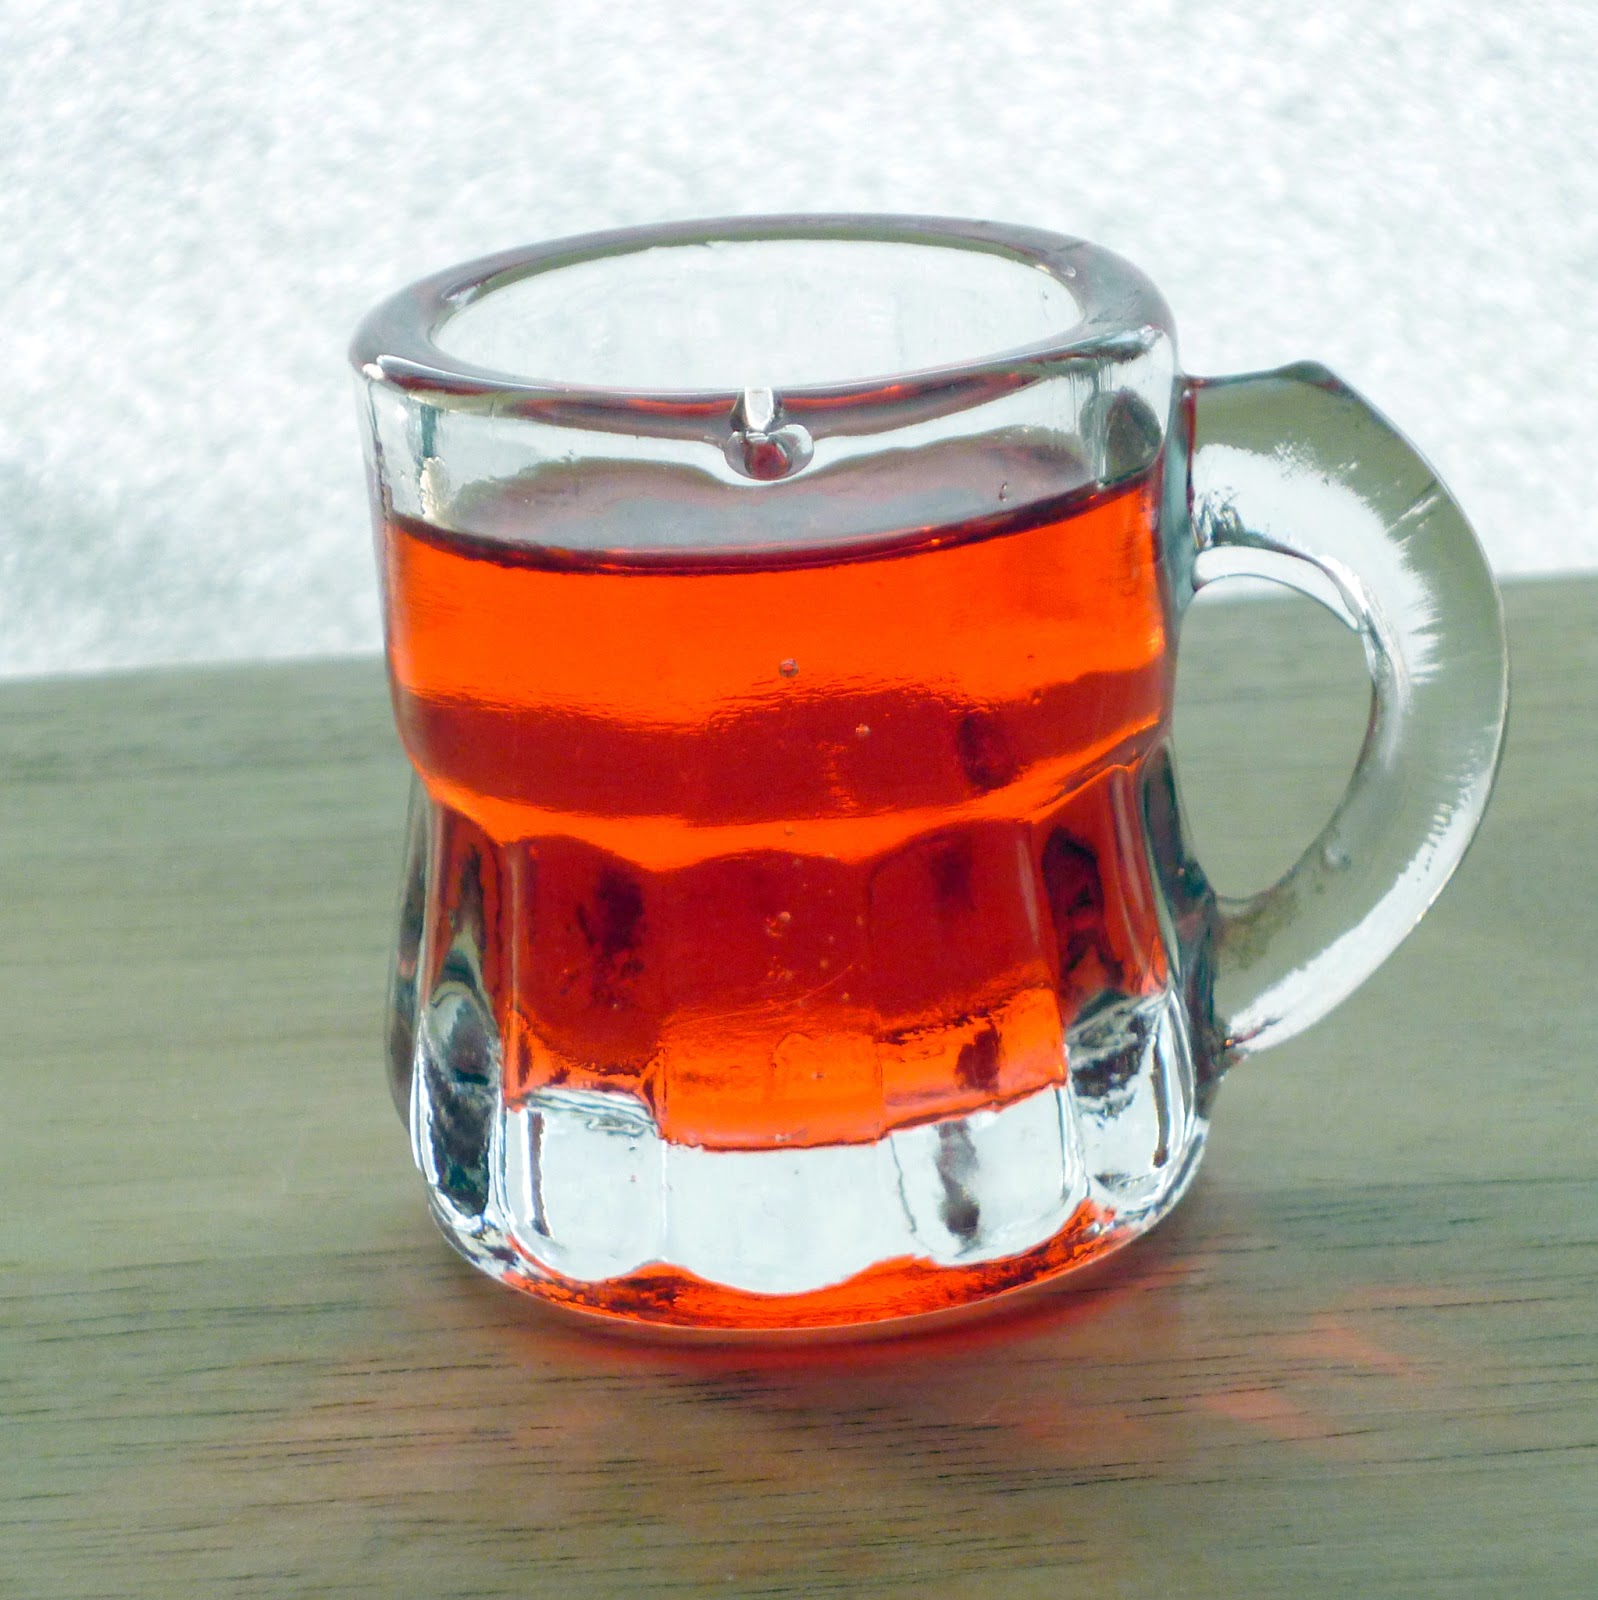
The cherry is by far my favorite of the two flavors I made. The only down side is that it does kind of have that cough medicine aftertaste. I think that maybe using more candies may help with it. Also, I tried it as a shot - aren't my beer mug shot glasses cute? - and next time I think I may mix it with some lemon-lime pop to help cut down on that cough medicine taste.
Because I liked this so well I'd really like to try making the watermelon and blue raspberry kinds as well. Maybe next time I venture down the candy aisle I'll pick up some more.
I wasn't that fond of the green apple flavor, and like the cherry I'd probably mix it with some lemon-lime pop next time. I really think that most of why I didn't enjoy this flavor as much is because I'm just not that fond of green apple Jolly Ranchers. I don't think it was really any flaw in the flavor itself, just my personal preference.
I made smaller batches of each flavor because I didn't have many candies on hand, along with the above mentioned reasons why I don't drink alcohol so much anymore. I did use the same ratio of candies to vodka though so the taste should not have been affected by using less of each.
If I make this again the future I would add a few more candies to each batch. While the flavor of the candy did come through, I feel like it wasn't quite strong enough and ended up tasting a little more alcohol-y than fruity.
Overall, they're pretty good as shots but if I were to be drinking them over the course of a night I would most definitely mix them with some lemon-lime pop. It would help cut down on the amount of alcohol you actually consume and make the drinks last longer.
It might also be fun to try other flavors of Jolly Ranchers since they have branched out from the original flavors of cherry, blue raspberry, watermelon, grape and green apple.
Have you tried making this yet? Which flavor was your favorite? If you haven't tried it yet, which flavor do you think will be your favorite?
*I do not condone drinking under the legal age limit of your country. If you are of legal drinking age in your country, please do so responsibly*
Wednesday, January 16, 2013
Bead/Pearl Bangle Bracelets - Project Pinspiration #3
I'm generally not a jewelry person but I'd like to be. I'd also like to not spend a billion dollars to start and build my collection so I thought these bracelets might be a cute way to start. They looked really easy so that was a big factor too.
My sister and I sat down one Sunday afternoon to make our own bracelets. I got the bangles at Hobby Lobby, but had some problems finding exactly what I was looking for. I couldn't find actual meant to be jewelry bangle bracelets so I ended up buying some macrame rings that looked like they would fit over my hand and around my wrist.
They were a pack of 6 for about $2.50
For the beads, I used some small pearl things I had a TON of here at home already. I just used hot glue and worked my way around the ring gluing and sticking the beads on.
We just used embroidery floss we had at home as well.
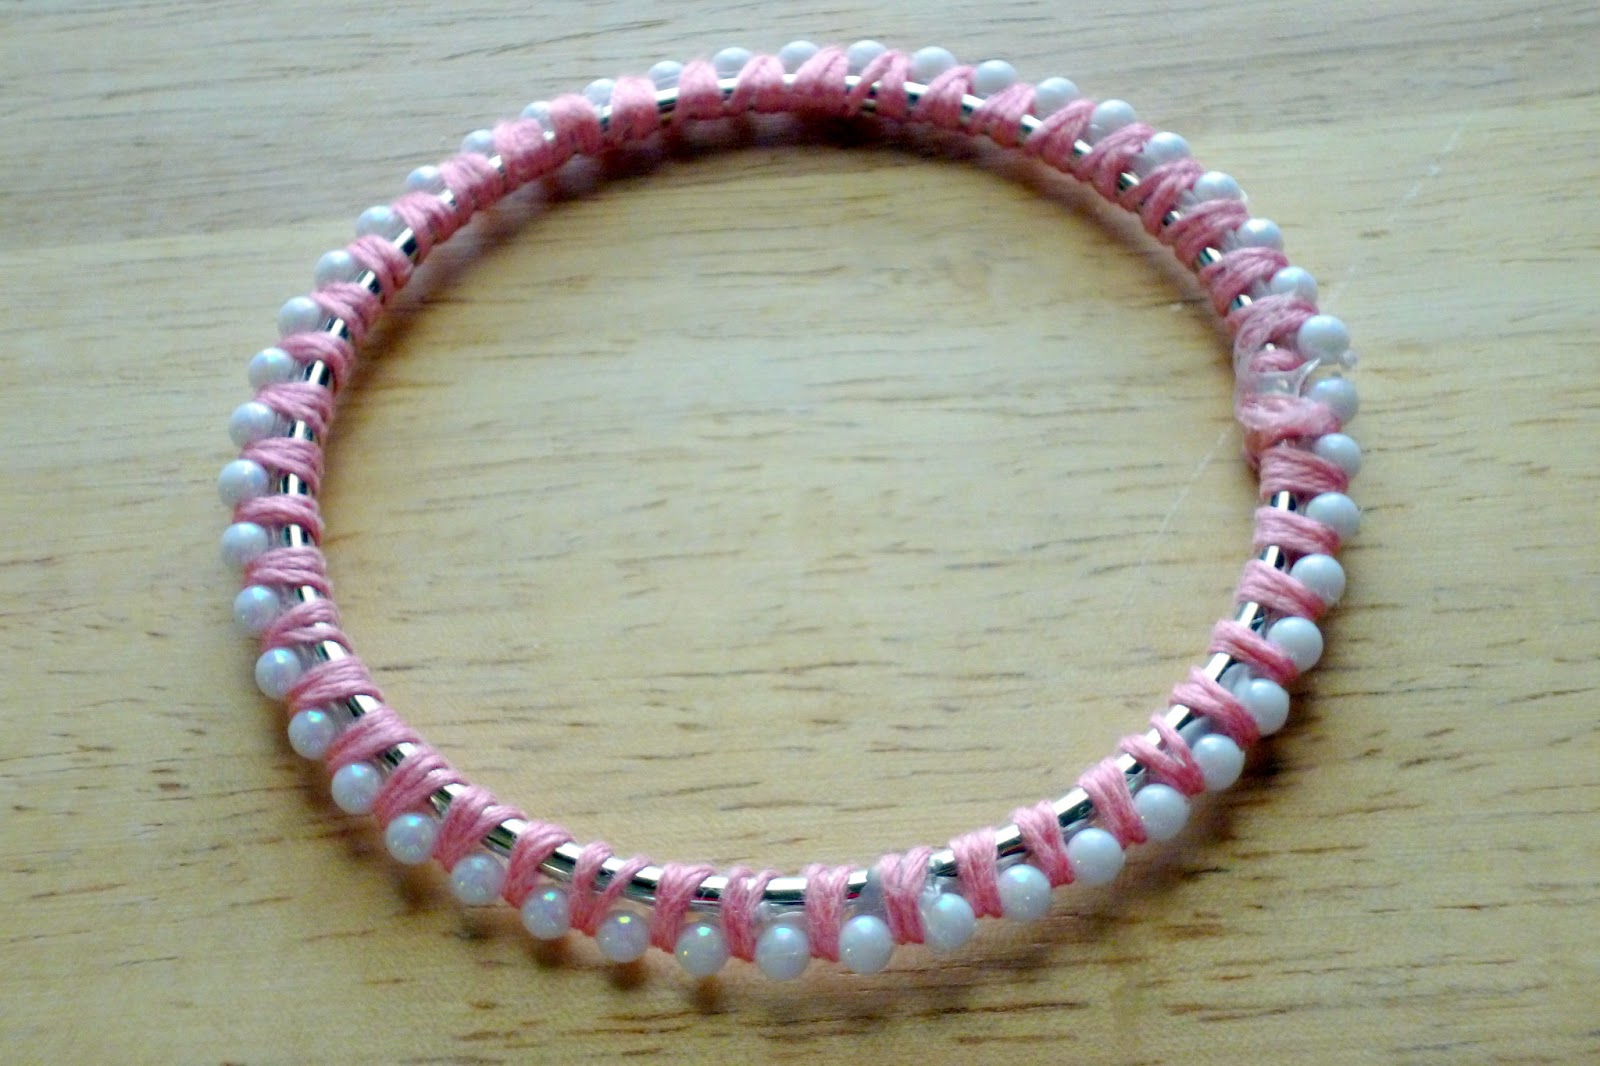
The instructions say to wrap about 2 or 3 times around between the beads, and I tried that with the pink one.
While I think it turned out pretty well, I really like how the blue one came out better. I wrapped that one 4 times around between the beads.
I think that part of it is because I like the blue color more, but I also think it looks more full and just generally looks better. I attribute this to the wrapping around 4 times since that's the only difference between the two.
So what do you think? Will you be trying these bracelets too? I'd love to see how yours turn out!
Friday, January 11, 2013
Fiesta Lime Rice - Foodie Friday - Project Pinspiration #2
A couple of weeks ago my husband was
Another couple of weeks before that we had Chipotle for lunch. Cue angels singing and rays of light shining down when I saw the pin pictured above pop up on my Project Pinspiration board!
Of course I did alter the recipe a smidge to suit our tastes and my husband's appetite, but it turned out wonderfully. I paired the rice with some steak and chicken cooked with a burrito seasoning packet from the grocery store and the huge burrito sized tortillas. It was a hit!
The next time I make this (note not an "if" but a "when"), I will probably add some diced red onion to the mix as well. Not that it really needs it, but the whole time I was munching away I kept thinking how good some red onion would be in there.
Oh! And as a testament to how delicious this really is, my very picky eater of a father loved it too!
Tuesday, January 8, 2013
Vicks Shower Disks - Project Pinspiration #1
I was so excited to find this pin, especially because it never fails that I am sick most of the winter. I'm not sure if it's colds, allergies or the flu, but I almost always have at least the sniffles from October to May. I used to buy these things at the store but for whatever reason they aren't available anymore. I don't know - because I haven't taken the time to look it up - if they were discontinued or if they're still out there but in limited areas. I just know that I can't go into my local Walmart and pick them up any more and it's really been years since I was able to.
So I followed the recipe - well I halved the recipe and did a few other edits as I saw fit for my needs - on the site linked in the pin above. I used:
1/2 c. baking soda
About 1/4 c. water
15 drops Eucalyptus essential oil
From the pictures on the blog post I followed, I think the original recipe makes 6 regular muffin sized disks. I decided I wanted to make mini ones so I halved the recipe. My version made 6 mini muffin sized disks. I also made this recipe twice, the first time I baked them at 350* for 20 minutes as it said I could and added the oil to the disks after baking. The second time I left them sit to air dry and the oil was put into the mixture before filling the muffin cups.
| Baked |
| Air dried |
I prefer the air dried ones in texture. They are so much less crumbly and brittle. I'm not sure if I did something wrong with the baked ones or what, but they weren't what I was expecting at all. The only thing I might try different next time is making a bit more of the mixture and filling the cups more. However, I one this size lasted me an entire regular shower so the size is really fine.
However, after letting the air dried ones dry for the recommended time, I couldn't really smell the eucalyptus when I used it in the shower. Outside the shower I could smell it though. I would recommend adding a couple of extra drops to the disk itself before placing it in the shower.
So would I recommend that others try this too? Yeah actually I would, but it seems you may have to play around with the recipe a bit to figure out what works for you. Humidity, among other things, could factor in to how these turn out.
Have you tried these? How did they turn out for you?
Thursday, January 3, 2013
30 Days of Pinspiration - Now Project Pinspiration
This past weekend I started working on the 30 Days of Pinspiration challenge I set for myself and realized a few things.
First, I love Pinterest. I already knew that it was an amazing site to get ideas from, but I guess I hadn't really realized just how amazing some of the pins actually were. I'll admit to spending an hour or so sometimes just pinning away for "someday" and never really getting past that initial pin. I'm so glad I've actually started going through and DOING some of the things I've found.
Second, there's no way I can limit myself to 30 projects. As I said above, there are way too many great ideas out there just waiting to be done. Also, the way I had titled the whole thing before kind of implied it would be a month long process and it was never meant to be that way. I'd like to spread the projects out as much as possible and if that takes the whole year, then it takes the whole year. I don't have a specific number of projects I'd like to do, nor do I have a specific length of time I'd like to do it in (though I'm leaning toward seeing how many I can do in a year).
I still need your help to get this done! I'll be using the same pin board that's already been started- but I'll be changing the name of the board to reflect the change in direction - to choose projects from. This means that I need a TON of projects to choose from - recipes, crafts, garden ideas, hair styles, beauty tips, EVERYTHING.
There are several ways you can do this:
- Send me an email with your email address and tell me you'd like to join the board and pin away
- Comment below with your email address and tell me you'd like to help out
- Comment below with a link/links to pins you think I should add to the board and I will pin them to the board myself
As always, I appreciate everything that everyone has done to help me with this. I've found some great ideas I might not have found on my own. I can't wait to see all the wonderful things I can fill my house with as this project progresses.
I'll be doing periodic reminders and updates aside from the posts about the actual projects I do so if you aren't ready to get on board just yet, no worries! There's always room for you when you're ready.
Monday, December 10, 2012
30 Days of Pinspiration
By now many of you know what Pinterest is. If you don't, consider yourself lucky and enjoy the hours of free time you have not spent saving things you "might" want to do later. And just in case you REALLY don't know what it is, it's basically a gigantic bulletin board where you can "pin," aka organize and save, ideas for really anything - food, beauty, craft, fashion, the list is just about endless.
So now that we're clear on what Pinterest is, I bet you're wondering what 30 Days of Pinspiration means. It can mean many things to many people, but for my purposes it means that I'd like to do 30 projects from Pinterest. Will these all be done in one month? No way Jose. I don't have that kind of time or money. However, my goal is to do a combination of craft and food ideas found on Pinterest - 30 of them to be exact - over the next several months. I figure I can probably do 1 or 2 each week for a total of 4-8 each month. At that rate, it should take me around 6 months, give or take a few on each side, to complete.
I will be needing your help though. I've created a board that I'm encouraging people to add project ideas to. All of the 30 projects will be chosen from this board - and only this board - so pin wisely and often! You can check out all the ideas currently on the board here. To be added as someone able to pin to the board I'll need your email address.
I'm looking to start this project in January, so get those pins in place! I can't wait to see what great ideas you all have for me to try!
Subscribe to:
Posts (Atom)